4 easy ways to remove gel polish or shellac from nails
Shellac or gel polish– one of the most popular long-term nail coatings, the application of which requires certain skills. If this procedure is most often performed in salons, then Removing such a product from the nail surface is quite possible at home.
Removing gel polish or shellac coating
Shellac base(Shellac from Creative Nail Design, made in the USA) – natural resin, thanks to which it is quite durable. Shellac or gel polish can stay on nails for 2 weeks or more. You need to understand that shellac is just one of the brands of gel polish manufacturers. Like Pampers, one of the manufacturers of disposable diapers.
![]() To remove this coating from nails in a salon, a special product is used to soften it - Product Remover, or carefully sawing off the coating with a router.
To remove this coating from nails in a salon, a special product is used to soften it - Product Remover, or carefully sawing off the coating with a router.
The master saturates the sponges with the liquid and places them on the nail plates, after which he wraps the fingertips in foil to secure them.
After 10-15 minutes, remove the fingers one by one from the overlays and, using an orange stick, carefully pry off the coating - it easily comes off the nail surface. Otherwise the process is repeated. Irregularities in the nails are removed using a soft file or buff.
Methods for removing shellac or gel polish at home
In order to remove shellac from nails at home, you can use both professional liquid and other improvised means. This coating is usually removed using:
- regular nail polish remover;
- soaking nails in nail polish remover or isopropyl alcohol;
- files or buff.
It’s much easier for those who have a special tool. But what if you don’t have it at hand at the right time, and for some reason going to the salon is impossible?
Method number 1: Regular nail polish remover
![]() The special product can be replaced with concentrated liquid for removing regular nail polish. Just pay attention: such a product must contain acetone. Other means will not work - they will not be able to soften the shellac even minimally.
The special product can be replaced with concentrated liquid for removing regular nail polish. Just pay attention: such a product must contain acetone. Other means will not work - they will not be able to soften the shellac even minimally.
For the removal procedure you need:
- Cotton pads or cotton wool.
- Regular foil, adhesive tape, tape - these will be needed to secure the cotton pads. Some people use polyethylene for these purposes, but it is not very convenient.
- Acetone nail polish remover, acetone or isopropyl alcohol.
- Orange sticks.
- File.
The foil is cut into 10 pieces of such a size that it can easily cover a finger. The cotton pad is cut in half, each half into 2 more parts. When using cotton wool, you should divide it into 10 optimal parts. Narrow tape or adhesive plaster is also cut into the same number of pieces.
Gel polish removal steps:
1. ![]() A piece of cotton pad is moistened in an acetone-containing liquid and carefully applied to the nail plate. It is necessary to avoid contact of the product with the skin, as it may cause a burn or an allergic reaction.
A piece of cotton pad is moistened in an acetone-containing liquid and carefully applied to the nail plate. It is necessary to avoid contact of the product with the skin, as it may cause a burn or an allergic reaction.
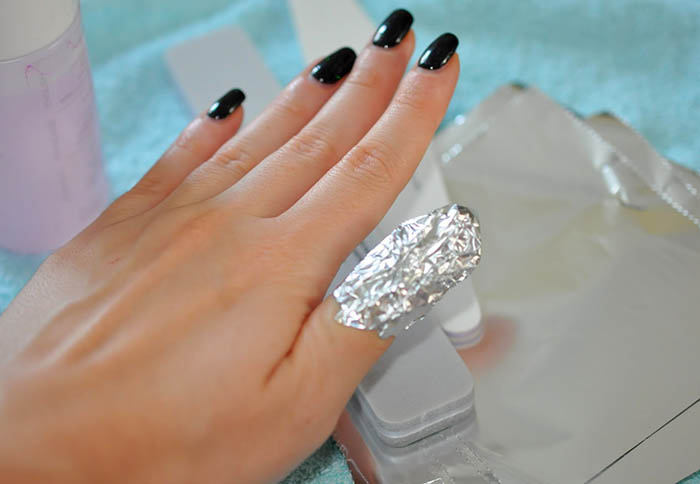
![]() 2. The nail along with the cotton pad is wrapped in foil. If fixation is insufficient, you can use tape or adhesive tape. These manipulations are performed in turn with each finger.
2. The nail along with the cotton pad is wrapped in foil. If fixation is insufficient, you can use tape or adhesive tape. These manipulations are performed in turn with each finger.
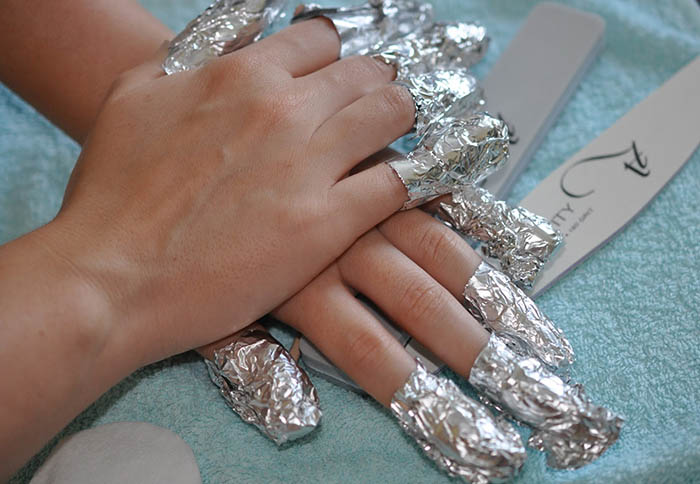
![]() 3. Each finger should be in foil for 10 to 20 minutes. This time is necessary for maximum separation of shellac from the nail surface.
3. Each finger should be in foil for 10 to 20 minutes. This time is necessary for maximum separation of shellac from the nail surface.
![]() 4. After this time, the compresses are removed in the same sequence as they were applied.
4. After this time, the compresses are removed in the same sequence as they were applied.
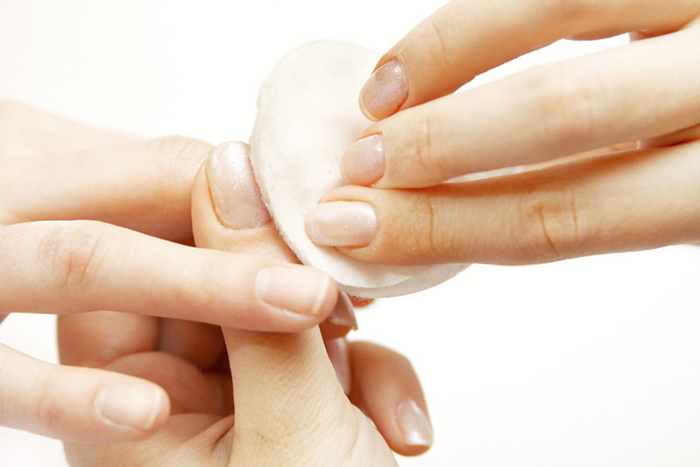
![]() 5. The layer of softened shellac is carefully lifted with an orange stick and removed. Remains of shellac from nails can also be scraped off with this device; you should not use much force - this can injure the nail plate.
5. The layer of softened shellac is carefully lifted with an orange stick and removed. Remains of shellac from nails can also be scraped off with this device; you should not use much force - this can injure the nail plate.
![]() 6. When all the coating has been removed, the nails are polished with a special file or buff.
6. When all the coating has been removed, the nails are polished with a special file or buff.
- if you need to remove not shellac, but gel polish, it is better to remove the top layer with a router to facilitate and speed up the procedure;
- if a new coating is planned after removing the shellac, it is enough to remove the top and color layer with a file or buff without touching the base layer;
- shellac (gel polish) will come off easier if you warm up your hands before the procedure;
- in order to protect the skin from the effects of acetone, before applying cotton pads, you should apply Vaseline or oil to it;
- To prevent the softened shellac from hardening, the foil must be removed from each finger in turn.
The video below clearly illustrates the procedure for removing shellac:
Method #2: Dipping your fingers in nail polish remover
You will need:
- A small container that can fit the fingertips of both hands.
- Nail polish remover or isopropyl alcohol.
- Fat cream.
- Orange tree wood stick.
- Buff or file for polishing.
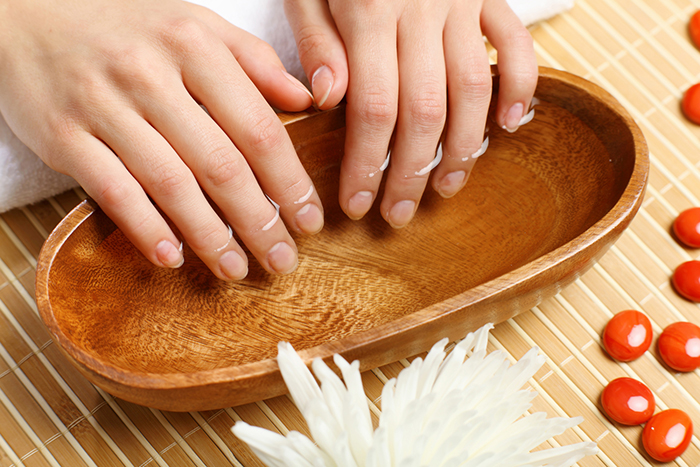
Before the procedure, you should wash your hands thoroughly. Then you need to pour the liquid into a container, lubricate your fingers with cream and dip their tips into the container. You can keep your nails in it for about 8 minutes. Then the softened shellac is removed using an orange stick. Hands are washed again and the cream is applied again.
Method number 3: Cutting off shellac
This method is the most risky.
The top can be filed using a file or a highly abrasive buffer for the natural nail surface. It’s good if you have a nail milling machine at home.
![]() So, this method can be safely used only if you leave the base coat on. It is very easy to distinguish it from a natural nail: it is not transparent, has a soft milky color.
So, this method can be safely used only if you leave the base coat on. It is very easy to distinguish it from a natural nail: it is not transparent, has a soft milky color.
Method number 4: Special shellac remover
A specialized shellac remover differs from acetone in its composition, which helps to remove the coating from nails as quickly as possible.
![]() This liquid also contains acetone or isopropyl alcohol, but along with these aggressive components, glycerin, vitamins A and E, vegetable and essential oils, petroleum jelly are also often added to it. These components provide the necessary care for the nail plates, saving them from depletion.
This liquid also contains acetone or isopropyl alcohol, but along with these aggressive components, glycerin, vitamins A and E, vegetable and essential oils, petroleum jelly are also often added to it. These components provide the necessary care for the nail plates, saving them from depletion.
That's why the best option would be to purchase a special shellac remover. You can buy such a product at any store that specializes in selling manicure products, or order it on specialized websites.
Removing shellac using a special product differs little from the first method, the only difference will be the reduction in the duration of keeping the fingertips in the pads - To soften the coating in this way, 8-10 minutes are enough.
Advantages and disadvantages of home methods for removing shellac
![]() The undoubted advantage of the first method is its low cost.– you don’t need to spend money on tools and materials; usually they can be found in every home. If you do have to spend money, they will be enough for several withdrawals. The advantages also include saving time - the procedure can be performed without waiting in line to make an appointment at the salon.
The undoubted advantage of the first method is its low cost.– you don’t need to spend money on tools and materials; usually they can be found in every home. If you do have to spend money, they will be enough for several withdrawals. The advantages also include saving time - the procedure can be performed without waiting in line to make an appointment at the salon.
There are more disadvantages - some inconvenience is possible (when removing the coating on the right hand, the foil slips, when the nails of the first hand are wrapped in foil, it is difficult to prepare the other), an increase in the duration of the procedure up to an hour - when treating hands alternately, the risk of injury to the nail when using metal tools, or skin, exposure to a fairly aggressive liquid on the nails.
![]() The advantage of soaking nails in nail polish remover or isopropyl alcohol is the speed of the procedure, the ability to observe the destruction of shellac and control the process. A significant disadvantage is the aggressive effect of the liquid on the skin and nail surface (drying), as well as possible injury to the nail surface when removing shellac with a metal pusher.
The advantage of soaking nails in nail polish remover or isopropyl alcohol is the speed of the procedure, the ability to observe the destruction of shellac and control the process. A significant disadvantage is the aggressive effect of the liquid on the skin and nail surface (drying), as well as possible injury to the nail surface when removing shellac with a metal pusher.
![]() Cutting the shellac coating down to the base layer has its advantages - saving time, the ability to immediately apply a new coating. But with all this, you can touch or inadvertently cut off the entire top layer of the nail plate, thereby injuring and thinning it.
Cutting the shellac coating down to the base layer has its advantages - saving time, the ability to immediately apply a new coating. But with all this, you can touch or inadvertently cut off the entire top layer of the nail plate, thereby injuring and thinning it.
![]() Removing shellac coating with a special liquid has more advantages than disadvantages. The first include the minimum time spent, the presence in such a product of components that can have a positive effect on the nail surface. The only disadvantages include possible inconvenience when removing the coating from nails yourself, and the risk of damage to the nail plate if you use the pusher carelessly.
Removing shellac coating with a special liquid has more advantages than disadvantages. The first include the minimum time spent, the presence in such a product of components that can have a positive effect on the nail surface. The only disadvantages include possible inconvenience when removing the coating from nails yourself, and the risk of damage to the nail plate if you use the pusher carelessly.
Benefits of removing shellac in a salon
The most significant advantages of the procedure done in the salon are shortening the process duration due to the use of professional liquid, eliminating the risk of injury to the nail plates, complete removal of shellac without the remainder of a microscopic film. The specialist can also select suitable care products for the nails after removal.
Craftsmen often use special devices with various attachments - milling cutters. This significantly speeds up the procedure. These machines can be used when, after removal, a new coating will be applied, in which case the base layer is not removed.
Differences between shellac and gel polish
The word “shellac” often means not only gel coating produced by CND, but also other gel polishes. This definition is erroneous, since these products differ from each other in composition, consistency and properties.
Main differences:
- before applying shellac, the nails are treated with a degreasing agent; before applying gel polish, the nails are treated with a primer and the top layer is removed from the nail plate;
- Unlike gel polish, shellac does not contain harmful components such as formaldehyde and toluene;
- removing the shellac coating is quite simple - you just need to use a special liquid, but gel polish must first be filed down, and then use a liquid with an acetone base;
- shellac is more durable, but more expensive than gel polish.
With all the convenience of shellac and gel polish coating, you should not forget to give your nails a rest. That's why you need to take breaks between coatings, they should be 10-14 days.
Restoring nail plates after shellac removal
Often, after removing the shellac coating, it is discovered that the nail plates have weakened and become thinner. This means that a break is necessary, during which the nails are not treated with wellness treatments. During such periods It is better to give the nail plates a rest and avoid applying even ordinary varnishes.
There are a huge number of simple recipes. Some of them:
![]() Add 1 tbsp to 100 ml of warm water. l. sea salt and 5-6 drops of iodine. You need to keep your nails in this bath for about 20 minutes, then dry them and apply a rich cream.
Add 1 tbsp to 100 ml of warm water. l. sea salt and 5-6 drops of iodine. You need to keep your nails in this bath for about 20 minutes, then dry them and apply a rich cream.
![]() Bath with the addition essential oils. You will need 250 ml of warm water, sea salt - 1 tbsp. l., grapefruit, tea tree and cedar oil - 1 drop each. Mix all the components, keep the nails in the resulting liquid for 10-15 minutes, then dry them and use a cream to moisturize or nourish the skin.
Bath with the addition essential oils. You will need 250 ml of warm water, sea salt - 1 tbsp. l., grapefruit, tea tree and cedar oil - 1 drop each. Mix all the components, keep the nails in the resulting liquid for 10-15 minutes, then dry them and use a cream to moisturize or nourish the skin.
![]() In order to strengthen the nail plates, you can use oils: almond, lemon, eucalyptus, chamomile, rosemary, sandalwood, apricot. To restore the structure of nails, you need to use oils: geranium, rosehip, tangerine, avocado. To get rid of it effectively use lemon oil.
In order to strengthen the nail plates, you can use oils: almond, lemon, eucalyptus, chamomile, rosemary, sandalwood, apricot. To restore the structure of nails, you need to use oils: geranium, rosehip, tangerine, avocado. To get rid of it effectively use lemon oil.
Thus, to safely remove shellac at home, it is necessary to follow the technology for removing this coating and not carry out manipulations that could damage the nail plate. Don’t forget about periodic restorative procedures for nails.