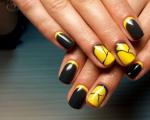
Gel manicure - how to apply shellac correctly
Gel polish has long revolutionized the beauty industry. This unique material combines the best qualities of varnish and gel. The technology of simple application with a varnish brush is combined with the strength and durability of the polymer, and the base coat will provide evenness and good adhesion. But not many people know how to apply shellac correctly, so first you need to familiarize yourself with all the rules of this procedure.
Any salon technician can easily create an excellent manicure using shellac. But what to do if you don’t have enough money to regularly visit the salon, but you always want beautiful nails? The solution is to do a manicure with gel polish at home.
At first glance, it seems that a salon procedure is much cheaper than purchasing the necessary materials and tools, but this is not so. The coating lasts on average two weeks, the bottle consumption is very small, so a manicure at home will pay for itself after just two or three uses.
There are, of course, other options to make your nails beautiful, for example, doing extensions that are harmful to your nails for four hours, or painting them with regular polish, redoing it every day. With gel polish everything is much easier and faster.
What you need for a shellac manicure at home
By choosing a shellac coating, a fashionista gets a two-week manicure in one hour that does not lose its gloss, does not chip or crack. But such a result is only possible if you know all the subtleties of application. Otherwise, the end of the wear will come in just a few days.
To make your hands beautiful you need to stock up on time, patience and the necessary materials:
- File with abrasiveness 230 grit
- File for natural nails
- Polishing buff
- Degreaser
- Lint-free wipes
- Cuticle remover
- Pusher or orange stick
- Primer
- Bonder
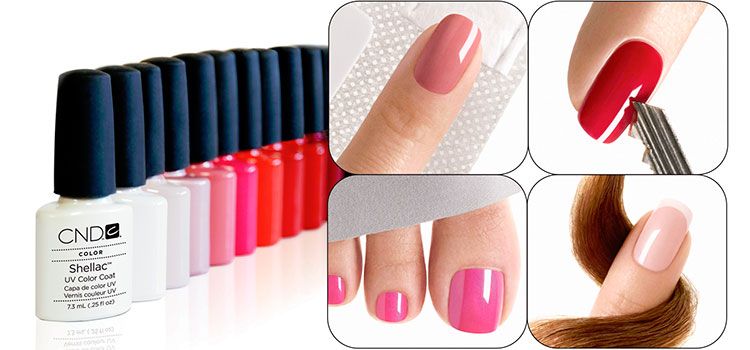
- Base coat
- Pigmented gel polish
- Finish coating
- Dispersion remover
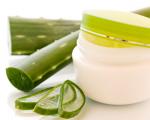
- Cuticle oil
- UV or LED lamp
To ensure that your manicure at home does not disappoint, you need to pay attention to the base and top coat. It is best to choose proven, well-known companies, since in pursuit of profit you may come across low-quality material. The consequences of such savings can be not only in a short-lived manicure, but also in harm to shellac nails. The finish and base should be of a uniform consistency, without lumps or foreign substances. When purchasing, be sure to check the expiration date of the material.
This is necessary for the nail plate to rest and recover. During this period, it is better to treat it with various strengthening agents at home.
To properly remove a manicure at home, you will need a gel polish remover and foil sponges. To save money at home, you can take regular cotton pads and food foil. Before removing the nail top, you should file it down, so the coating will come off faster.
Secrets of applying shellac at home
A trip to the salon pleases any female person. Everyone will be pleased to relax in the hands of a master and trust his experience. Often this amenity is relatively expensive, given that this procedure needs to be done twice a month. Unfortunately, not everyone can afford it, some don’t have enough money, some don’t have enough time. The optimal solution could be a manicure at home, the main thing is to know how to go through these stages correctly.
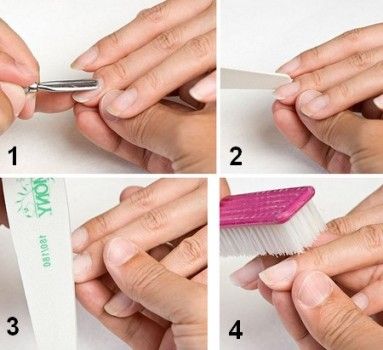
After preparing the tools, a very important moment comes in preparing the hands and nails. How long the coating will not peel off depends on this stage:
- The first thing you need to do is clean your nails of the old coating, even if it is clear varnish.
It is best to do a cleansing manicure with soaking a few days before applying shellac.
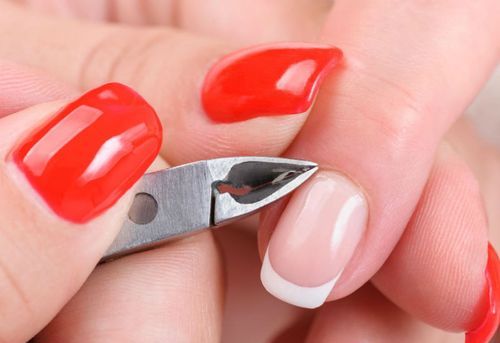
- Even in advance, you can remove the cuticle at home by cutting. This will allow you to save money at home on a special product that softens the cuticle.
- If you already have such a product, you need to apply it to the cuticle area, leveling with an orange stick, and leave for a few minutes to soften.
It is important to remove all dead tissue from the nail, otherwise early detachments cannot be avoided.
- There is no need to apply various oils, masks and other products before applying gel polish; the surface of the nail must be absolutely clean and dry
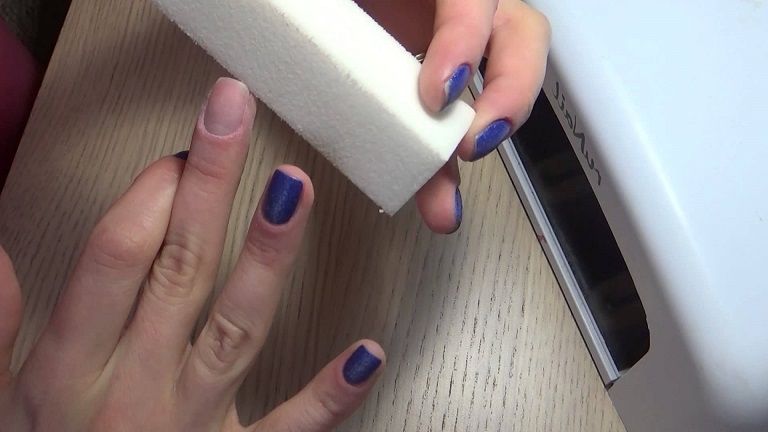
- Next, you need to file off the shiny layer of the natural nail plate with an abrasive file and sand it with a buff.
To avoid unnecessary harm to your nails, you need to read the instructions for shellac, as some brands do not require filing and sanding.
- Remove the resulting dust with a soft brush, degreaser or cotton wool moistened with water. Be sure to wait until it dries
- If your nails are naturally wet, or your hands were exposed to water before applying, it is better to use a dehydrant. It deeply dehydrates the surface. But if everything is fine with the nail plate, you can do without it.
Further, at home, many make the mistake of skipping the application of primer and bonder, or replacing them interchangeably. Of course, at home it is difficult to do everything correctly, but, nevertheless, you need to try to do it. First the primer is applied. It protects the natural nail plate from harmful effects and pigmentation, removes moisture and degreases. It dries in a couple of minutes in the air. When using a primer, you do not need to use a degreaser.
After the primer, just before painting the base coat for the nails, you need to cover the surface with a bonder. It serves for better adhesion of coatings. Of course, it is not always possible to use it at home, so you can get by with just the base, but the wear time of such a manicure will not be so long. After thorough preparation, you can begin applying gel coatings. This technique is simple:
- The base coat is applied in a very thin layer. It smoothes the nail plate and promotes adhesion.
If you paint with too thick a layer, it may simply not dry under the lamp.
There will also be problems when removing manicure, since it will take more time to destroy the layer, therefore, there will be more harm from the remover
- Colored shellac also needs to be painted thinly, otherwise the coating will not only not dry out, but will also shrink and bubble. Usually, for brightness and good coloring, it is simply applied in a couple of layers, polymerizing each one. There is no need to remove the sticky layer; it serves as an additional adhesion
- The finish can be painted in a denser layer than the first two. The final coating will serve as a shield throughout the entire wear of the coating. It will protect against tarnishing, scratches and minor damage. Despite the fact that this is the most durable layer, you should not once again test the finish for strength by picking anything or using your nails as bottle openers
Each layer needs to be dried for a couple of minutes in a UV lamp, and 30-40 seconds in an LED lamp. Upon completion of drying of the last layer, a dispersion is formed, which is removed with nail polish remover, a special liquid or degreaser. After removing the sticky layer, the finish will shine with gloss, which means the manicure is ready.
Before you start manicure, you need to find out the nuances of the work. Even self-taught beginners should know some subtleties that will help them do a manicure correctly. After all, everyone knows that mastery lies in the details.
- Be sure to apply moisturizing oil to the skin around the nails and cuticles. At home, you can use regular vegetable oil
- If at home during the application of any layer the substance gets on the skin, you need to carefully remove it. To avoid such troubles, you need to paint your nails one millimeter away from the skin.
- When lubricating, you can twist your finger to even out the gel. As a last resort, you can remove the uncured coating with a lint-free cloth and degreaser.
- After the preparatory stage, you should not touch your nails with your fingers, otherwise the sebum will return to the surface
- When applying each layer, you need to brush along the edge of the nail, and a little from below, especially if it is a finish.
Having familiarized yourself with the basics of applying shellac, you can safely begin to practice. After proper application, a manicure can become not only a visual addition to your image, but also a source of pride. This covering will definitely please any fashionista and will take a worthy place on the dressing table.