How to make shellac: step by step tutorial
Hands are like the calling card of any woman; they should always be in the most ideal condition. But sometimes there is no time left for a manicure. Shellac comes to the rescue. With its help, you can make your nails beautiful and neat for a relatively long period of time. It cannot be called mega-resistant, but the fact that it stays on the nails without chipping and much longer than the average varnish can be said with absolute confidence.
By the way, another huge advantage of shellac over varnish is that the former, unlike the latter, does not lose its glossy shine throughout its entire wear. And durability can be extended by selecting and purchasing high-quality components. From my experience I will say that there are shellacs that peel off already on the fourth day, and there are those that last perfectly for 2 weeks or more. With experience you are sure to find your favorites.
What do you need for shellac
Shellac requires very few ingredients. Buying everything from scratch, taking into account the color coating and a good lamp, the purchase will cost 3,000 rubles. Considering that the cost of such a manicure from a specialist costs 800-1,000 rubles, then such a purchase will pay for itself after three or four sessions.
So, the set includes:
- a nail file for removing glossy shine from a “bare” nail;
- means for degreasing and removing the sticky layer;
- base coat;
- color coating (shellac itself);
- top coating;
- special lint-free wipes;
- lamp for coating polymerization.
Let me make a reservation right away that it is better not to replace napkins with cotton pads. When removing the sticky layer, and even when degreasing the surface of the nail, hairs may remain from the cotton wool, which will not have the best effect on the quality of the manicure. In this regard, wipes are very convenient; they are also sold in professional cosmetics stores and are cheap, literally 30-40 rubles for 100 pieces.
Now let's get to the manicure itself.
How to make shellac
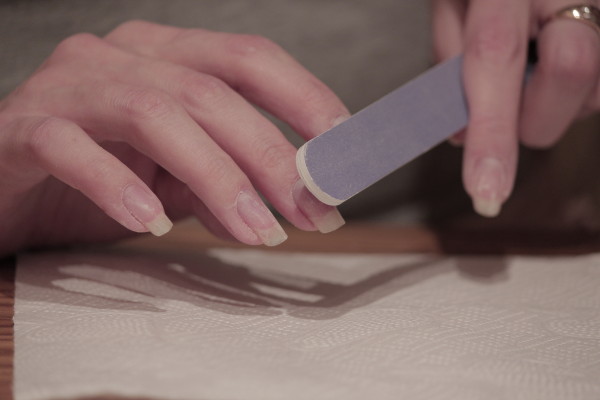
It will be unnecessary to talk about the need to shape the nails, etc. After all the preparatory measures, the glossy layer must be cut off from each nail. This is done with a nail file and without excessive zeal, so as not to injure the nails.
After this, each nail needs to be degreased, and this should be done not only on the surface itself, but also under it. This is very important, otherwise it may shorten the “life” of the manicure. 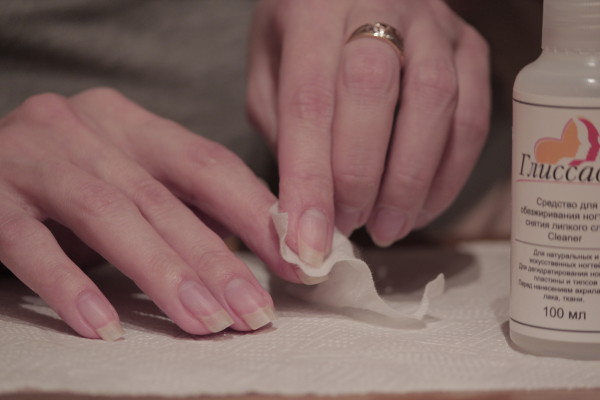
Let your nails dry completely and you can begin applying the base coat. Apply it in a very thin layer, having first removed the excess from the brush by wiping it on the neck of the tube. Don't think that the more it is, the longer the shellac will last. Don't forget to seal your nails by going over the end of the nail with a brush - this is one of the main secrets to avoid chipping in this weak spot. And also, under no circumstances touch the cuticle or side ridges. Otherwise, especially if the shellac is liquid, it will spread over the skin and it will be almost impossible to stop this “heat”, and the manicure itself will be ruined. 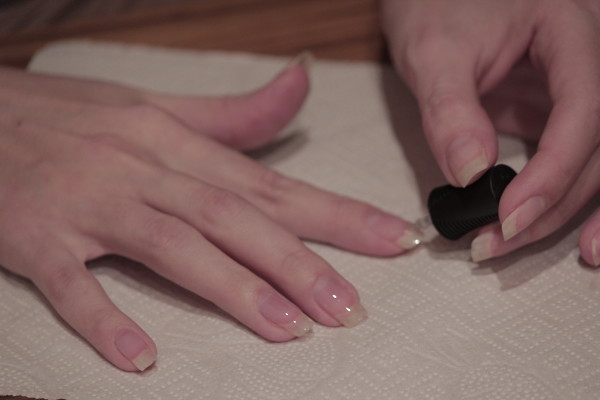
Dry the coating in a lamp. When using a UV lamp it will take three minutes, with an LED lamp it will take 30 seconds. 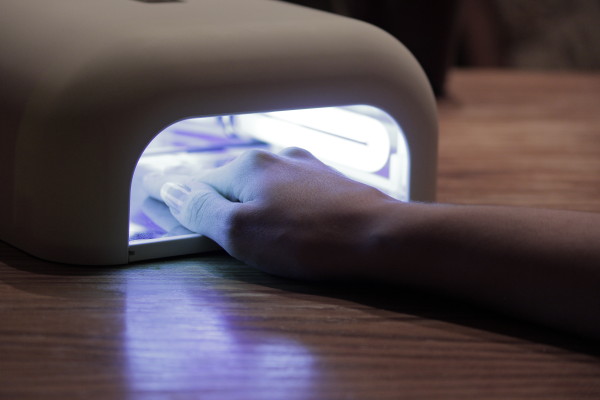
Now you need to apply the first layer of shellac. Apply it very thinly. If you apply a thick layer, it can bubble or “cook”, as if flowing down, forming mini-waves. Brightness and color saturation can be achieved by the number of layers, and they can be up to three or four, depending on the liquid and thickness of the coating. But each layer must be thin. 
Dry the shellac in a lamp in the same way, but for less time (for UV lamps - 2 minutes, for LED lamps - 30 seconds). 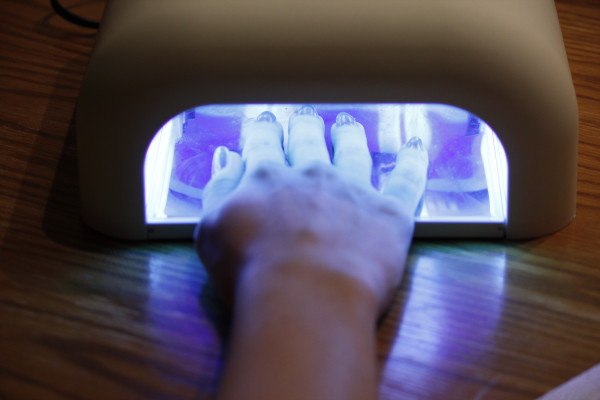 Proceed to apply the second layer. Take your time, go over the entire nail without leaving bald spots. And repeat the drying procedure again.
 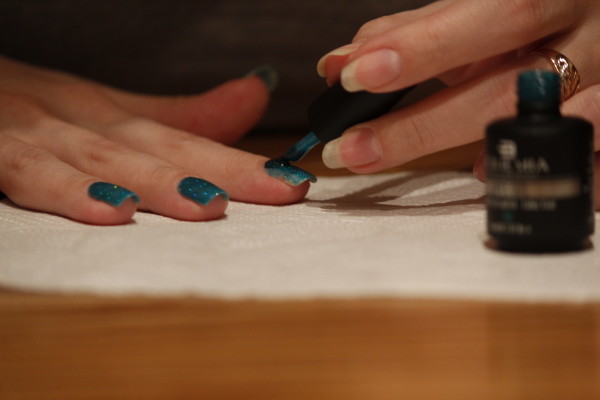 If two layers are not enough, apply a third. After this, be sure to treat your nails with a top coat. It can be glossy or matte - this is a matter of taste. In my case there is gloss. Here you also need to seal each nail to prevent chipping. Dry the coating in the same time as the base.
 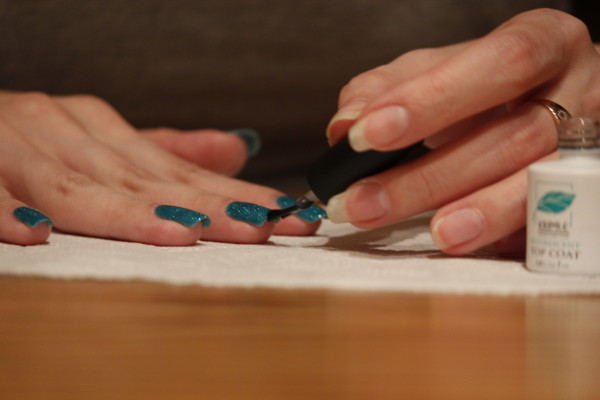 We proceed to the final stage - removing the sticky layer. This may not be necessary as not every top coat has this tacky layer. Dampen a napkin in a special liquid, blot each nail with it several times, then wipe off the layer with confident movements, moving from the cuticle to the end of the nail. Don’t worry, the shellac has completely polymerized and this will not affect its quality in any way.
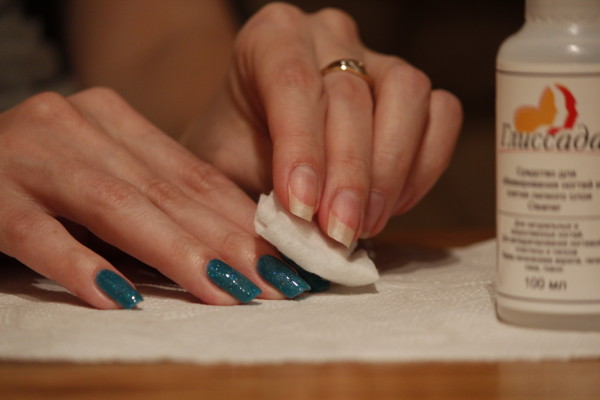
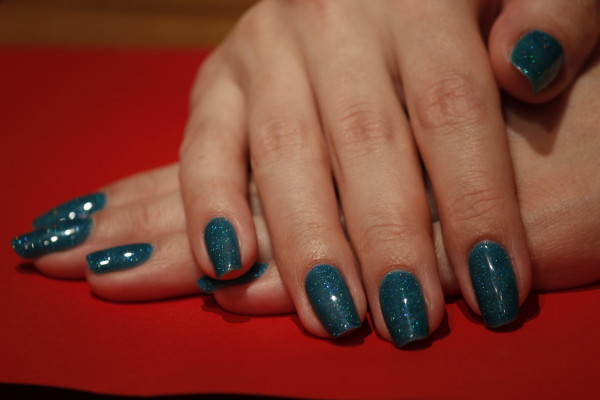
That's all, our beautiful and neat manicurist is ready! All this takes no more than half an hour, but the effect is worth it. By the way, pedicures are performed in the same way. As you can see, there is absolutely nothing complicated in the process and paying money to other people for this procedure makes no sense. And with the money saved, it is better to regularly replenish your shellac collection.