How to make shellac at home and what you need for it
Is it possible to get a chic, long-lasting and inexpensive manicure at home? Certainly! This is quite accessible to any woman, inexpensive and quite easy to implement. This manicure is called shellac.
Many girls who dream of beautiful nails are interested in the question: “How to make shellac at home?”
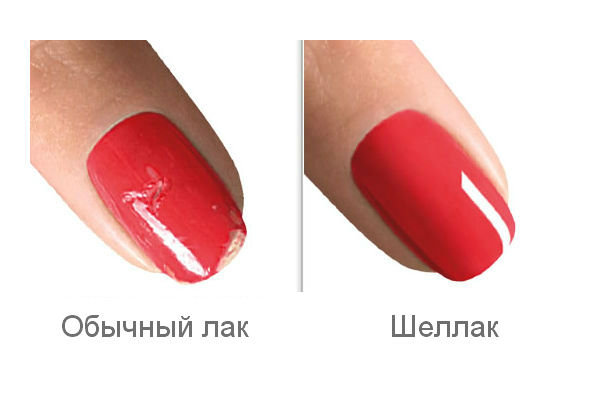
The cosmetic product was created by the American company CND (Creative Nail Design) and is a mixture of varnish and gel. Shellac combines all the positive properties of gel, and at the same time is less expensive.
Gel polish has many advantages:
- To work with gel polish, coarse abrasive tools are not used to remove the top layer from the nail plate; it is only lightly sanded.
- Shellac is much easier to remove than gel, and the nails are not damaged.
- Modern materials used for the production of shellac do not injure nails with harmful substances and are not allergens.
- Reliable coating protects nails from environmental influences.
- Not susceptible to sea water, scratches or chips.
- The coating retains its original appearance for at least two weeks.
- Can be done at home.
- For flawless nails, you don’t need to spend a lot of money, since the manicure set lasts a long time.
- Apply to your nails and do not require extensions.
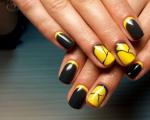
- A rich color palette allows you to create nail designs to suit every taste.
- Easy to work with, dries quickly.
- After removing the coating, no nail treatment is required.
 Thanks to these advantages, the popularity of shellac in salons is not decreasing, but is only growing. But not every girl can visit a manicurist twice a month.
One is too busy, the other does not have enough finances to pay for the work of a professional, and the third loves to tinker with her nails herself.
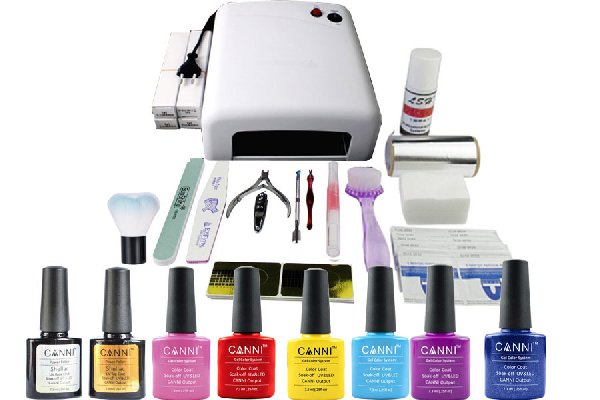
In order to do a shellac manicure at home, you should not only purchase gel polishes in the desired colors, but also have all the tools necessary for the job. A one-time investment in the purchase of a shellac kit will more than pay off over time.
What you need for a shellac manicure:
- A UV lamp is required to cure the coating. The lamp power must be at least 18 watts. Even better is a 36 Watt lamp. This power will allow you to dry gel polish very quickly.
- A special degreaser included in the kit will remove excess moisture or grease and allow the coating to better adhere to the nail plate. Alcohol wipes can be used for the same purposes.
- Fine abrasive files or buffs will gently polish the surface of the nail.
- A set of tools for working with cuticles and the free edge of the nail: files, nail scissors, nippers or cuticle remover, pusher.
- Decorative coating products: base coat, colored shellac, top coat, sticky remover, cuticle oil.
The list of tools and products for such a manicure is impressive. But all of them are necessary to achieve a quality result.
Shellac application technique: how to paint nails
If all the necessary tools have been purchased, then you can slowly get to work. And the first thing you need to do before painting your nails with shellac is to prepare your work area. Everything needs to be laid out in order and ease of use. The room should have good lighting, both daylight and artificial.
Step-by-step technique for applying shellac in one color:
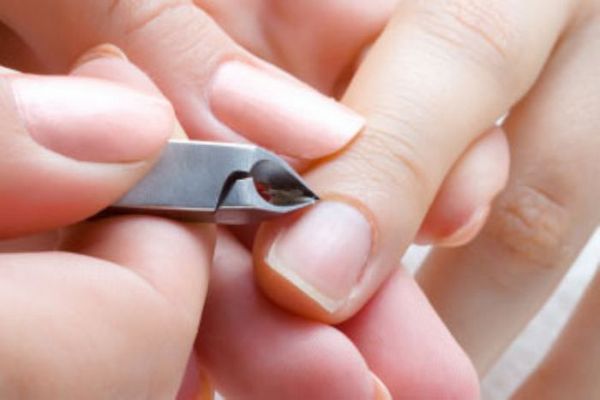
- The first stage is a standard manicure procedure, which includes removing the cuticle and filing the free edge of the nail. To do this, use your usual nail treatment method. The cuticle can be trimmed or removed using a special liquid. It is important to remove as much of it as possible, since the manicure takes a long time and the rapidly growing cuticle will ruin the appearance. File your nails with a file, giving them the desired shape.
- The second stage is preparing the nail plate for applying gel polish. To remove shine from nails, polish them with a buff or a soft nail file. Brush off dust with a manicure brush. Try replacing the brush with a cotton swab or cloth. Degrease the surface of the nails and periungual ridges with the special liquid included in the kit. From this moment until the shellac application procedure, they should not be touched. Are you out of degreaser but don't have enough money to buy it? Feel free to replace the degreaser with alcohol wipes. They can be bought at any pharmacy and are not expensive.
- The third stage is applying the shellac coating. Doing this is as easy as painting your nails with regular cosmetic polish. First, apply one stroke at a time along the edges of the nail plate, then make a stroke in the middle. Movement with the brush is from the cuticle to the free edge.
The base coat protects your nails from colored gel polishes. A single thin layer of base is dried under a UV lamp for 12 seconds to 1 minute. The time depends on the power of the device (read the instructions). The base should cover the entire nail plate. Apply it as close as possible to the cuticle and roller areas. Don't forget to seal the ends and free edge of the nail.
The main coating consists of two layers. How to paint your nails with shellac: the first layer is thin, dry for about 1 minute, the second is a little thicker, hold under the lamp for two minutes. Two coats are needed for color saturation. If you immediately apply a thick layer, the gel polish will swell and everything will have to be redone.
The top coat is applied in one thick layer. Drying in a lamp takes 2 to 3 minutes.
- The fourth stage is consolidation of the result. After all layers of shellac have been applied, you need to remove the sticky layer with the desired product. In this case, lint-free wipes are ideal for working with nails. The final manicure liquid can be replaced with acetone or alcohol, but the result will not always be good. In some cases the gloss will be dull.
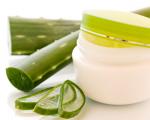
Don't forget about caring for your cuticles. Rub special oils into it after finishing work.
The marigolds are ready!
How to properly do shellac manicure at home: technology features
 Despite the apparent simplicity of performing a manicure with gel polish, achieving a salon-quality result will require the diligence of a beginner. Over and over again, this procedure will become shorter and shorter, and your nails will become more beautiful.
The technique of manicure using gel polish of the same color is discussed above. But various ideas for decorating nails have their own characteristics of shellac application technology.
Among the most popular gel polish coatings is French manicure or its version, French. This design can serve as the basis for various designs, patterns, and compositions of decorative elements.
For French manicure, the color range is extensive. You can buy different shades of pink and pastel colors for the base and just as many white shades for the tip of the nail. And the variety of colors for French manicure is simply amazing. In addition, gel polishes can be mixed to get the shade you need.
According to the technology of applying shellac in a French manicure, the first layer is the base, and the second is the smile line. If desired, apply patterns with a thin brush using the selected colors of gel polish. Each layer, as well as elements of the drawings, are dried separately in a UV lamp.
A manicure like a cat's eye is very interesting. It was named so because of the similarity of the magnetic pattern to a cat's eye. Today you can find such patterns in the form of stars, hearts, etc.
 How to perform a shellac “Cat’s Eye” manicure:
- Apply gel polish to the base. Bring a magnet to it at a short distance and hold it for 15 seconds. During this time, a pattern will form. The further technique is standard.
- Using a magnet, metal microparticles in gel polish create a three-dimensional vertical stripe or other patterns that shimmer in a certain way when finished.
How to perform a flawless shellac manicure at home, tips for beginners:
- Shellac should not be applied in one thick layer. Even if it dries, it will soon begin to peel off. Strictly follow the technology and apply at least two layers of colored gel polish.
- Another reason for shellac peeling is when part of the cuticle gets into the coating area. Thoroughly clean the nail plates from pieces of epithelium.
- Shellac can peel off when the nails themselves peel off. If there is such a problem, then before manicure with gel polishes it needs to be solved. You can strengthen your nails with medicinal baths. Minor problems can be removed by sanding the surface of the nail more thoroughly.
- Shellac can peel off due to internal disorders in the body: hormonal imbalance, vitamin deficiency.
- Unlike decorative layers, the top needs to be applied thicker. This type of coating creates strength.
- Apply gel polish evenly. If there are sagging, then chips in these places are possible.
- Be sure to maintain the prescribed time when drying in a lamp. If the coating does not dry, it may wrinkle. In this case, you will have to redo everything again.
- To get a good result right away, beginners should do a shellac manicure at home using one colored gel polish. Later, as experience grows, you can move on to more complex designs. If you need a holiday manicure, use a gel polish like Bluesky. Despite the fact that it is one color, Bluesky looks gorgeous. It is based on many shiny particles that give it a shimmering shine.
- Buy manicure products only from reputable sellers.
No matter how complex the technology of applying shellac is, anyone can master it. And if you like this business, then you can paint your nails not only for yourself, but also for your friends, adding a good profit to the family budget.