Shellac at home: how to make it, how to apply shellac correctly?
Shellac is a relatively new manicure method, less harmful and more effective than classic nail extensions. Today, the procedure for applying gel polish is quickly replacing other methods of nail treatment and design. Most girls and women of different ages, keeping up with the times, turn to manicurists wanting to carry out this procedure. Meanwhile, you can apply the gel yourself. How to make shellac at home? How to avoid financial expenses by refusing the services of a paid specialist?
What is Shellac?
Shellac is a natural follower of the gel nail extension technique and is a mixture of polymers that combine the properties of varnish and gel.
The substance contains:
- A film former is a component that, when hardened, forms a coating resistant to mechanical stress. It is the basis of shellac.
- Photoinitiator is an element that absorbs ultraviolet rays and is a catalyst for the hardening of the varnish.
- Pigment - the shades that make up shellac give the nails a particular color.
- Thinners are substances that help regulate the consistency of varnish.
- Functional additives - necessary to enhance and regulate the properties of gel varnish (color intensity, abrasion resistance).
Visually, shellac is a medium-liquid consistency base. The color of the composition varies depending on the pigment used. Gel polishes can be mixed with each other, thereby obtaining new color shades.
The varnish dries under the influence of open sunlight or light from a UV lamp. Coatings that are not dried in light are not very stable and have a long polymerization time. Shellac, which was dried using a lamp, is highly durable and remains intact for about two weeks.
Interesting to know: it is generally accepted that shellac contains the natural polymer “shellac” - an organic resin produced by some tropical insects. In reality, not a single shellac manufacturer claims to have this polymer in their products.
If we take a strict approach to the issues of terminology, then “shellac” and gel polish are not exactly the same thing. The fact is that “shellac” is the name of the product brand. That is, the term is nothing more than the name of one of the varieties of gel polish. Despite this, most women use both terms to generically refer to the product. The terms have actually become synonymous.
Advantages and disadvantages of shellac over regular varnish
Like any other manicure product, shellac has a number of advantages and disadvantages.
Among the first are the following:
- natural appearance;
- the cost is lower than that of acrylic nail extensions;
- a layer of shellac does not affect the growth of your nail;
- helps improve the condition of the nail structure;
- dries quickly and lasts a long time;
- adds shine to the nail;
- has a huge number of colors (about 250).
The negative qualities of shellac include the need for special devices for its application and drying. It is this factor that is the reason that one of the most modern methods of nail treatment is rarely used at home.
Which coatings to choose
In modern cosmetology, 3 types of shellac are used:
- single-phase;
- two-phase;
- three-phase.
Salons and private craftsmen usually use three-phase varnishes, consisting of three components: a base layer, a color layer, and a top coat. The base layer acts as double-sided tape, securely fixing the top layer to the nail plate. The color layer contains pigment and is used to create the base color. The top protects the coating from external influences and allows you to use stickers and designs on your nails.
Nails are treated with three-phase shellac when they want to create an additional design on top of it or achieve the longest possible preservation of the coating. After the varnish has completely dried, the sticky layer of the top coat is removed with a special product.
Single-phase shellac contains only one fraction, which combines the properties of the top, base and color base. These types of gel polish are easy to apply, but are not highly durable and do not allow you to create artistic nail designs. They are more often used in cases where a manicure needs to be done quickly, but there is no need for its long-term preservation.
Two-phase varnish represents the “golden mean” between single-phase and three-phase compositions. It is quite strong and stable, but you cannot apply additional patterns to it without using a top coat. A type of procedure using a two-component varnish can be performed by women who do not need additional nail design, but want to have a fairly durable layer of coating.
In addition to differences in the number of components, shellacs also differ in the effects they create. They can change color depending on the air temperature or time of day, have patterns, be matte or glossy. The choice of varnish according to these criteria depends solely on the woman’s personal preferences and style.
What you need for shellac: tools, materials
What do you need for shellac to apply it at home?
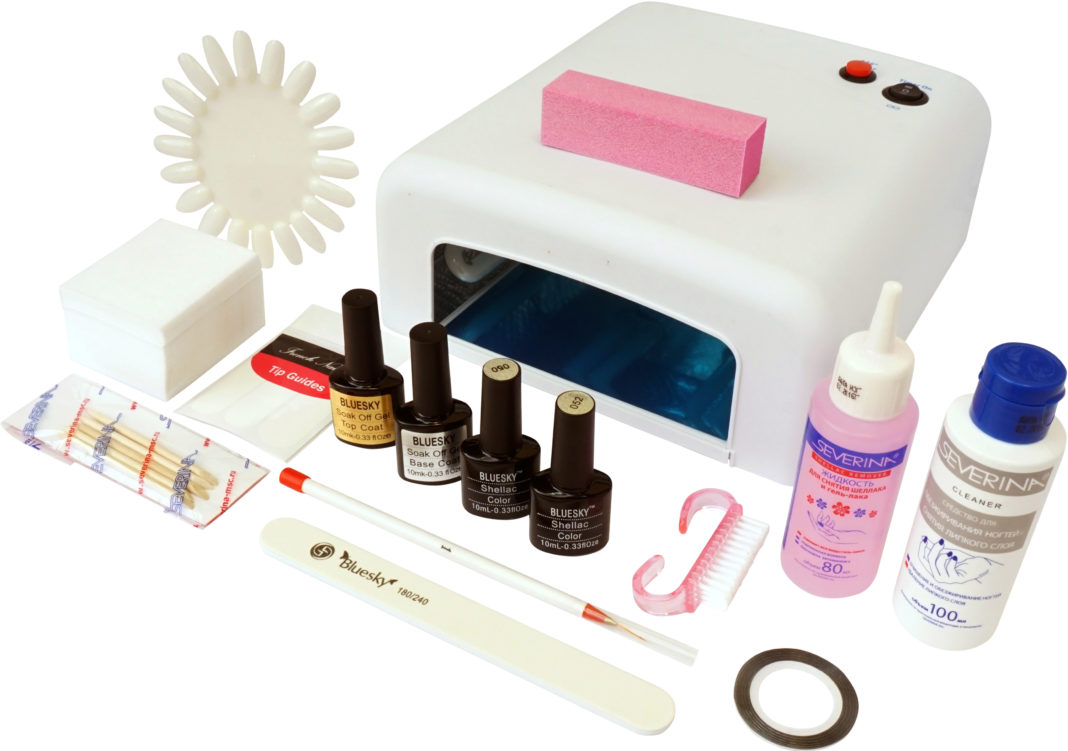
The procedure requires a certain set of tools and drugs, such as:
- nail file;
- cuticle remover;
- grinding plate;
- alcohol or other degreaser;
- lint-free napkin;
- moisturizing oil;
- ultraviolet lamp for drying.
It is interesting to know: to treat nails, you should use a nail file, and not scissors, which disrupt the structure of the nail. Surfaces cut with scissors are poorly suited for applying varnish.
Stages of applying shellac at home
The process of applying varnish consists of two main stages: preparing the nail plate and directly creating the varnish layer. The process should be considered using the example of three-phase shellac.
Preparation: working with cuticles, degreasing the nail surface
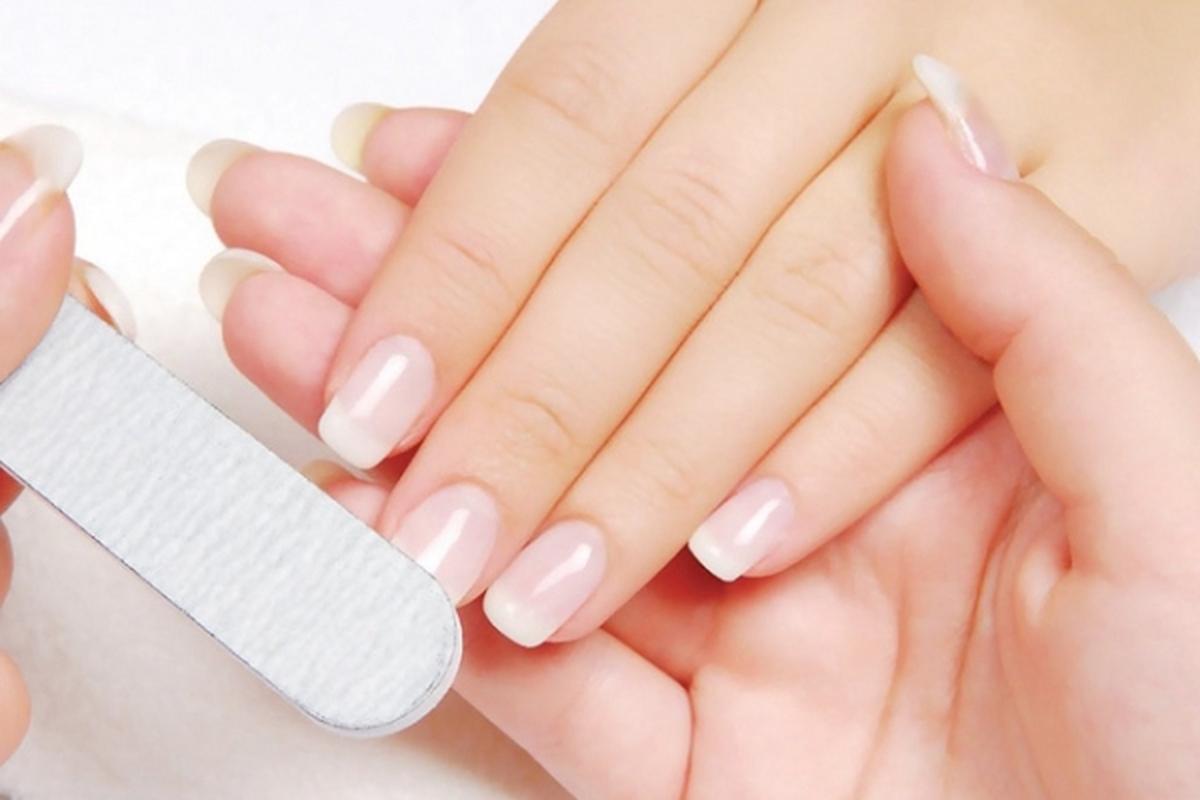
The preparation stage for applying shellac is as follows:
- Hands are washed thoroughly, but do not steam in hot water.
- Using a nail file, the nail is given the desired shape without affecting the skin. Dust consisting of nail filings is shaken off with an antistatic cloth or brush.
- Apply cuticle remover to the cuticles. For this purpose, the “cuticle eraser” composition is often used. The drug should be distributed carefully and evenly. After the unnecessary pieces of skin die off, they are removed with a cotton swab. The composition itself is thoroughly washed off with running water, and hands are dried.
- The nail is cleaned to a matte state with a sanding plate. If roughness is felt on it, you should use a sanding plate with a finer abrasive. The dust is wiped off again with a napkin.
- Carefully treat the nail plate and areas around it with alcohol or degreaser. Do not touch the treated areas with your fingers.
At this point, preparation for applying shellac is considered complete.
Note: before starting preparation, you must carefully examine the nail for remnants of old varnish. If the previous coating was not completely removed, the shellac will lie unevenly and of poor quality.
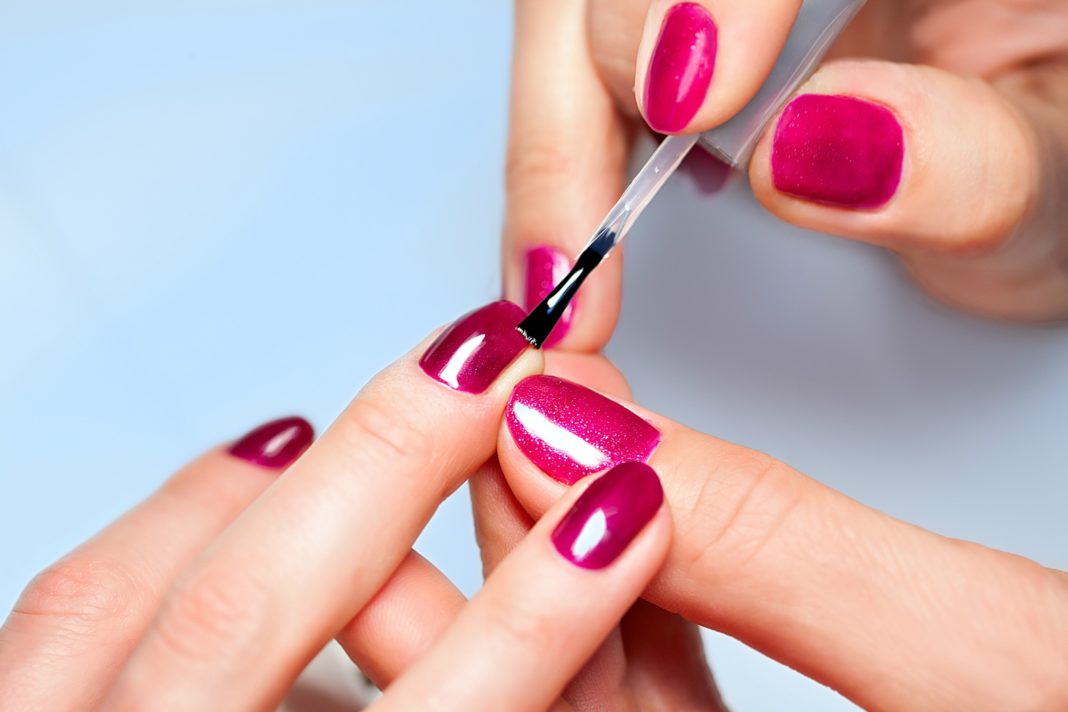
Base layer
The base coat is applied to the nail plate in a thin layer, allowing the varnish to dry in a short time. In this case, the composition should not get on the periungual ridges. After application, the varnish is dried in a UV lamp for 10 seconds.
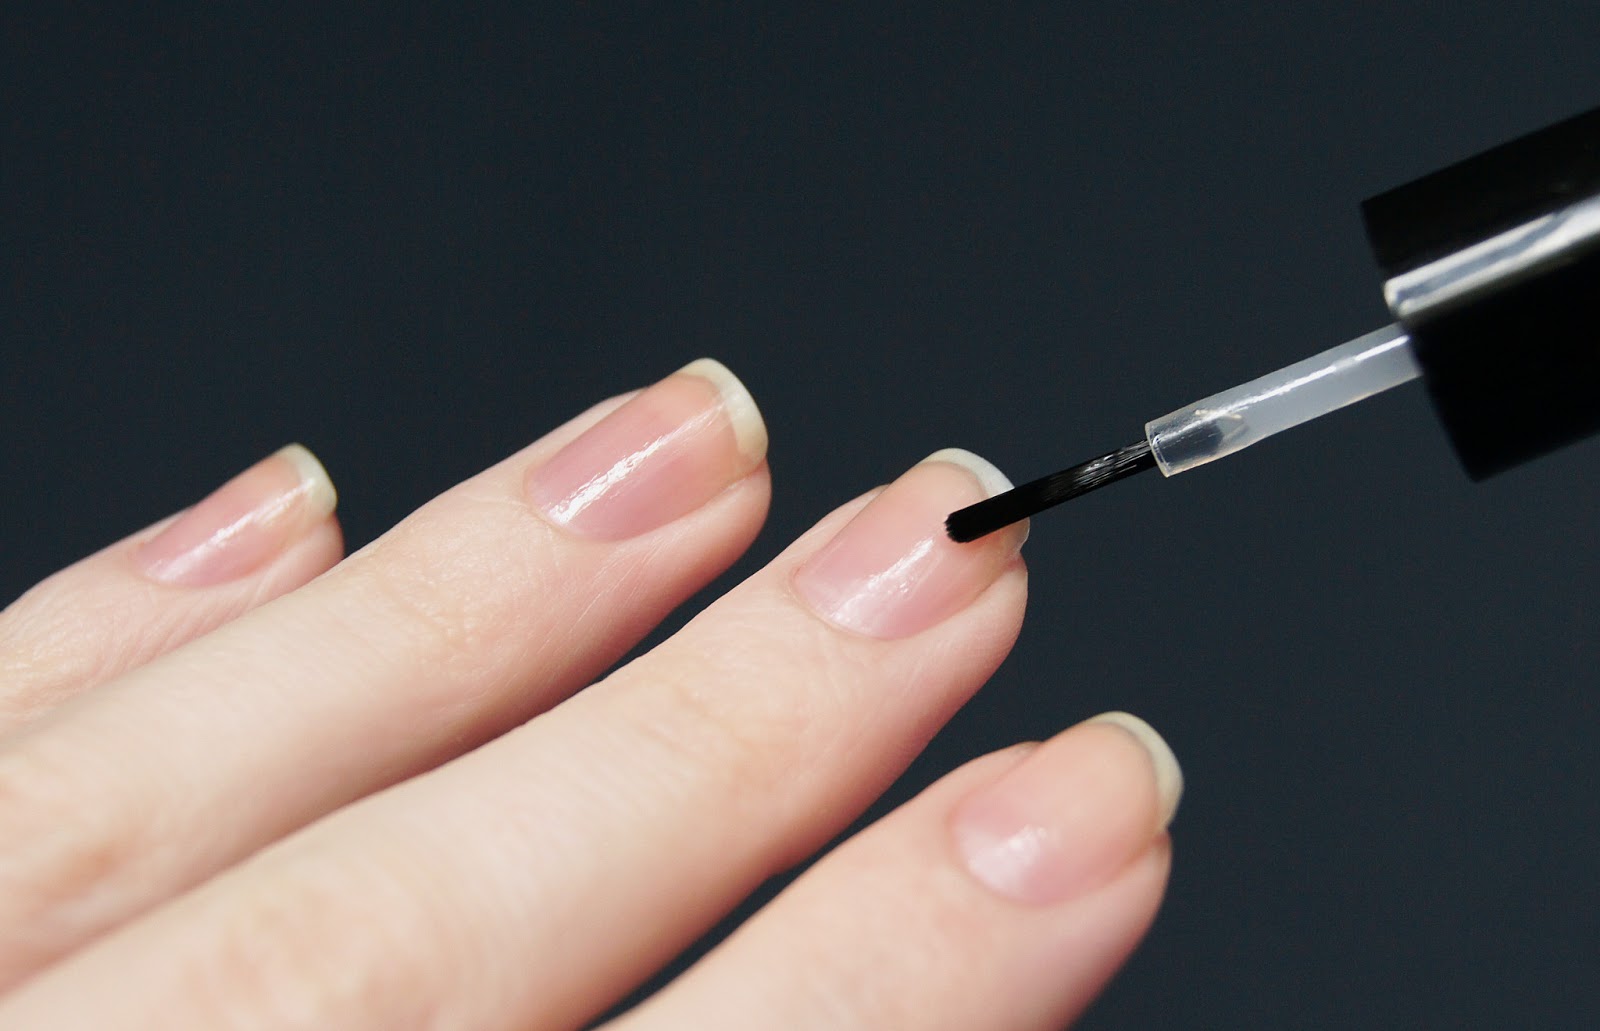
The lamp power must be at least 36 watts. If this rule is not followed, the drying time increases, which leads to the formation of matte spots on the base layer. Such phenomena are considered unacceptable.
Applying colored varnish
The color coating is applied after the base has completely dried. In this case, the sticky fraction of the base layer is not removed. The color should be applied in a thin layer. To obtain a more intense shade, apply the varnish twice, with an intermediate drying period of 10 seconds. Using one thick layer instead of two thin layers results in bubbles.
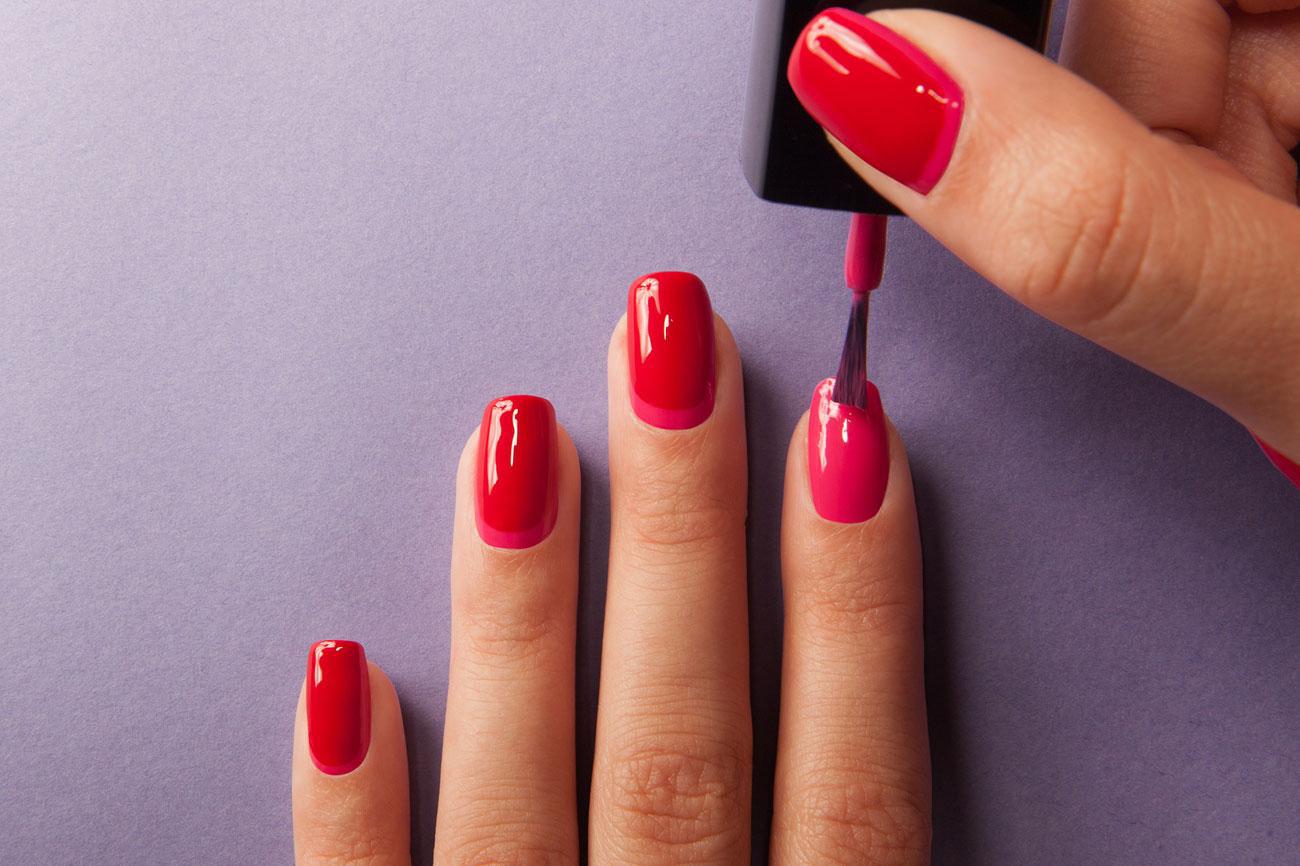
It is recommended to stir the varnish before applying. To do this, turn the bottle over in your palms several times. It is possible to mix two compositions of different colors to obtain new shades. It is better if both varnishes intended for mixing are from the same manufacturer. This will avoid damage to the material due to the incompatibility of some of its components.
Applying the top layer - top coat
The top coat of varnish is applied to the nail in a thick layer. In this case, you should carefully seal the edges of the nail plate, the area around the ridges and cuticles. After applying the top, dry it under a lamp for 2 minutes. After drying, the pigment remains between the base and top. This protects it from abrasion.
The sticky layer that forms on the top should be removed with a degreaser and a lint-free cloth. The use of gauze pads or cotton pads is unacceptable, as they leave lint that can stick to the coating. The layer is usually easily and completely removed with alcohol. Acetone or other substances with solvent properties must not be used.
After the shellac is completely dry, it is recommended to treat your hands with moisturizing oil. It is thoroughly rubbed into the periungual area until completely absorbed. This approach avoids dry skin, which is a side effect of using ultraviolet radiation.
Note: a correctly applied coating is smooth and glossy (if varnishes with a matte effect are not used), the color is evenly distributed. The presence of bubbles, stains or roughness indicates a violation of the operating technology.
Creative
The durability of the shellac top layer allows the use of additional design elements. Here the master is given the opportunity to show his imagination.
Mixing colors
Mixing colors is done at the stage of applying the pigmented layer. Everything here is reminiscent of a child's game with watercolors. Mix blue with white to get blue, red and white to get pink. If you add yellow varnish to the last mixture, the composition will acquire a beige color.
It is important that the varnishes are compatible with each other. Otherwise, the experiment will end in failure, and the unlucky coquette will be faced with the question of how to remove shellac, which has just been applied and is by no means cheap.
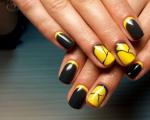
Sequin decor
Dry glitter of different sizes can be used to decorate nails. They are applied before the top coat dries. To do this, use a small brush to pick up the required amount of jewelry and shake it onto the nail from a distance of 2-3 cm. After this, the top is dried and a new layer is applied.
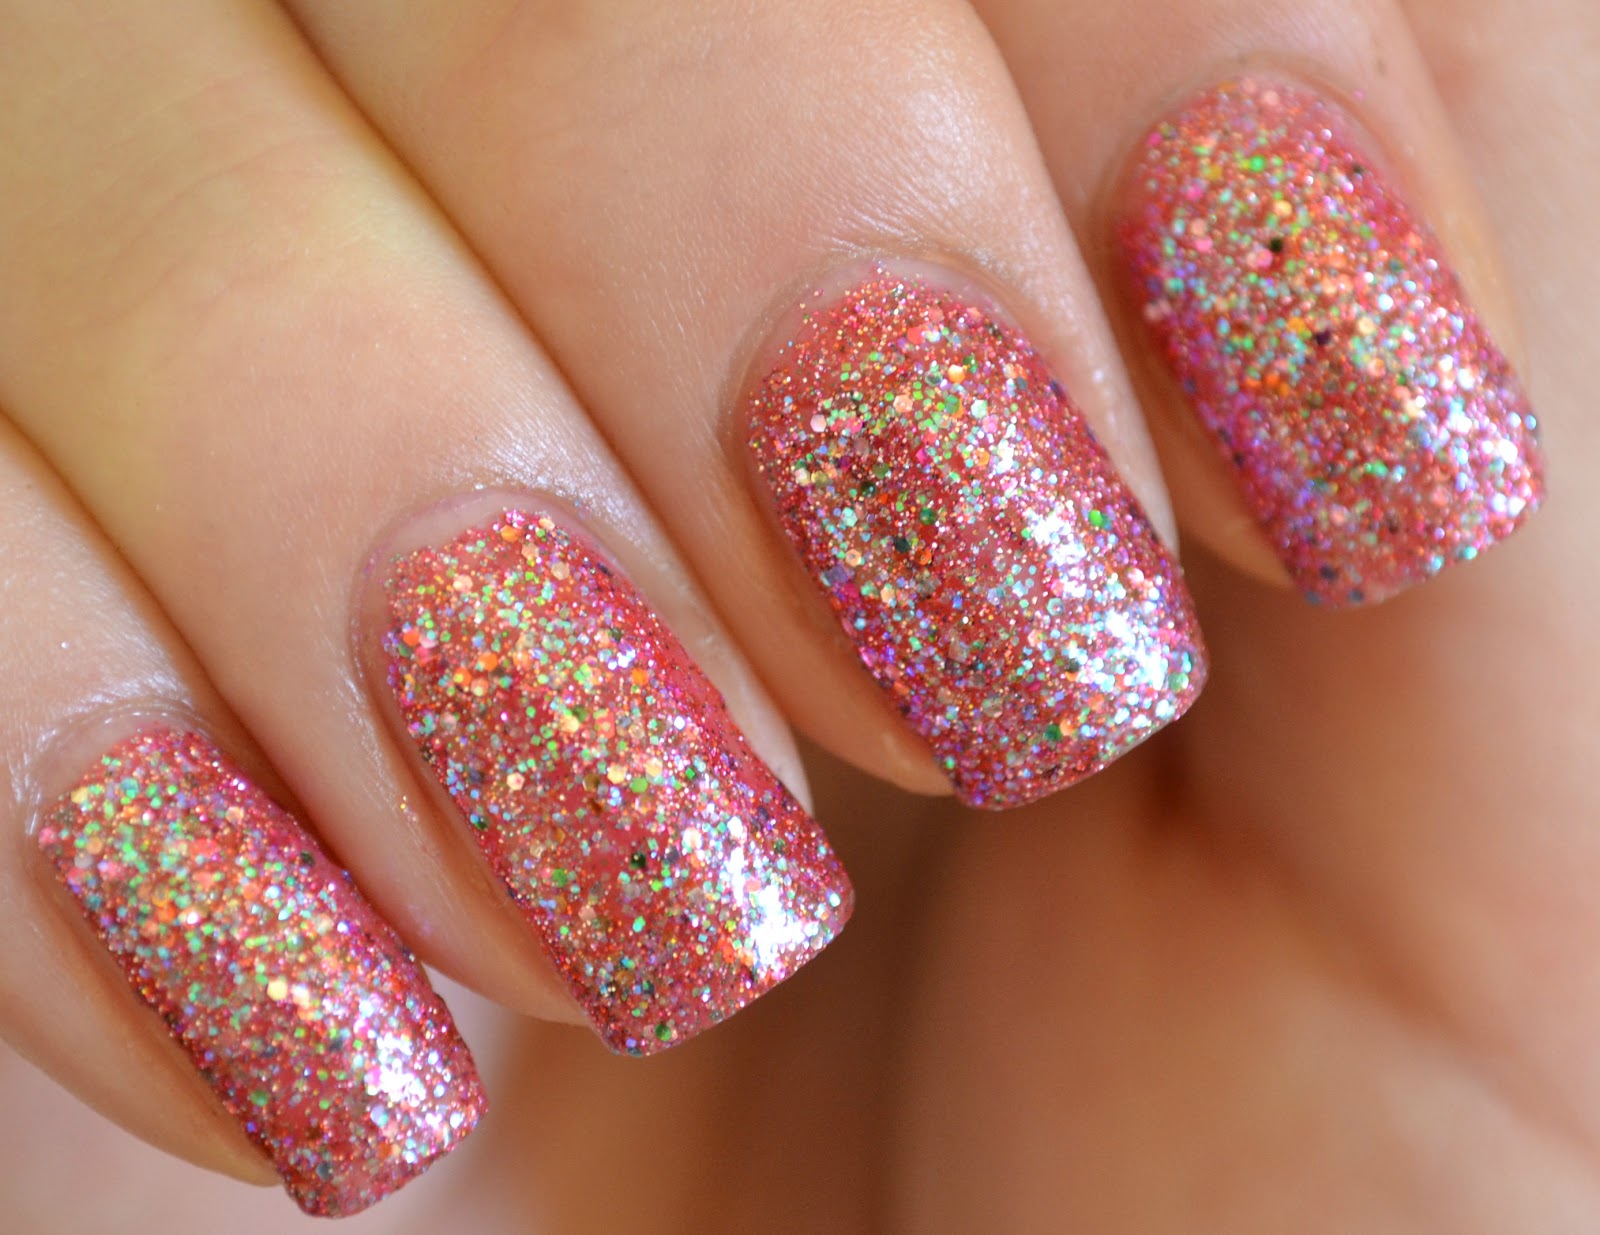
Small sparkles can also be added directly to the colored layer. To do this, the material is poured into the varnish before it is applied and mixed thoroughly by rolling the bottle between the palms. This composition should be used immediately after preparation, otherwise the glitter will settle to the bottom and will not get on the nail.
Note: to avoid the procedure of preparing glitter polish, you can use a ready-made version. The rules for applying shellac with the addition of glitter do not differ from those described above.
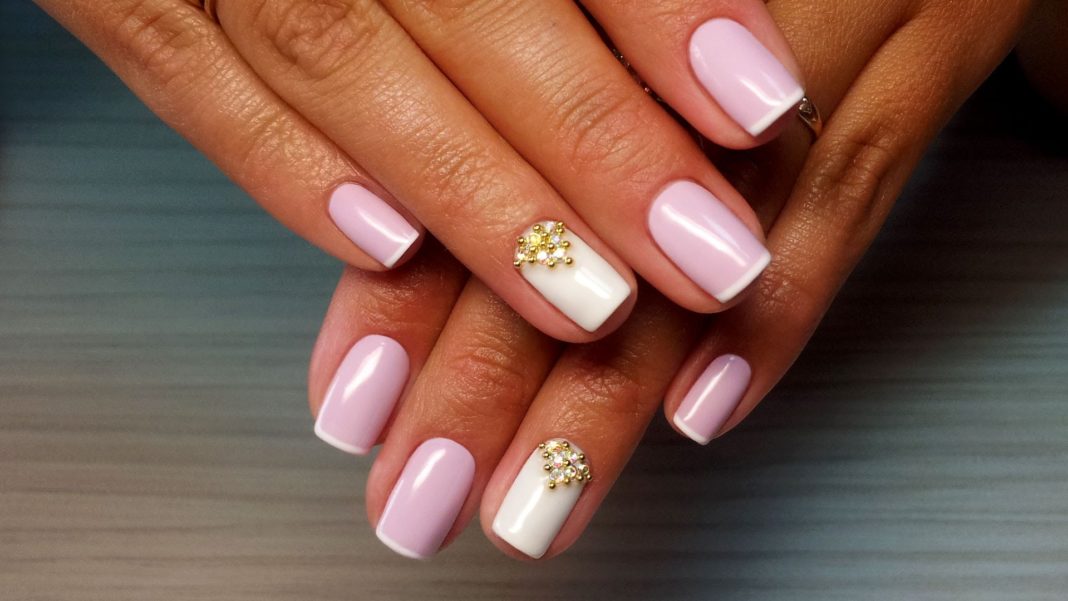
French manicure
A classic French manicure is a small nail with a protrusion of 3-4 mm and an oval or square end. As a rule, the nail plate has a natural shade, and its edge is painted white. This solution is considered universal and suitable for any outfit and event.
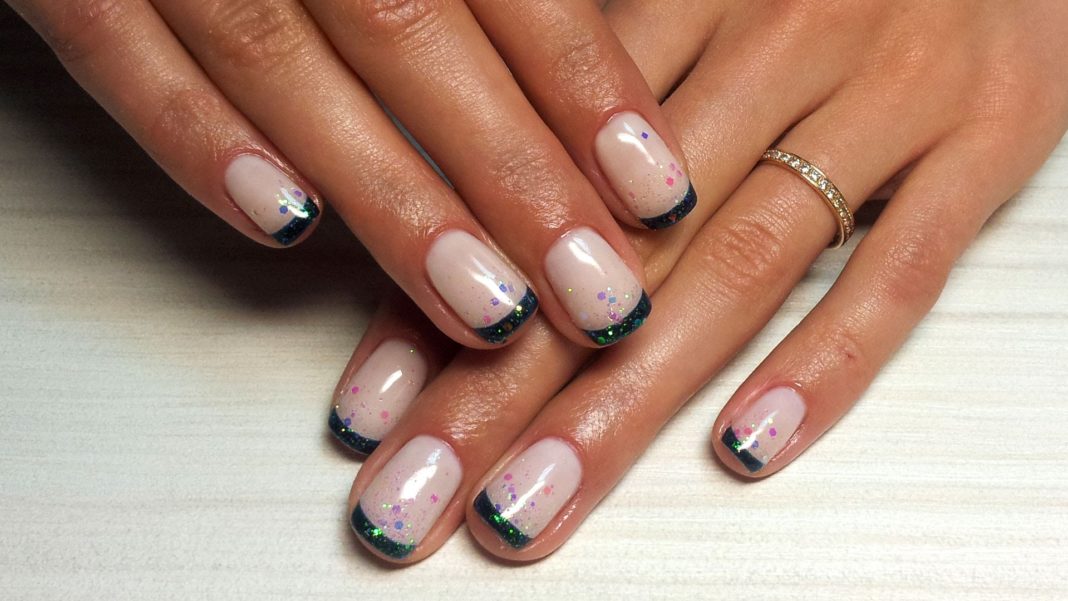
Today's nail art masters often resort to non-standard solutions. Thus, nails are often made pointed, with relief images or graphic patterns applied, while maintaining the general features of the French style. On nails you can often find voluminous white roses, clouds and other decorations, the choice of which is limited only by the author’s imagination and the requirements of common sense.
Decorating shellac with patterns
Patterns on shellac can be made directly using shellac of a different color or acrylic paints. Shellac patterns are drawn using a needle or a stamping kit. Each decorative element is dried separately under a lamp before applying the next one.
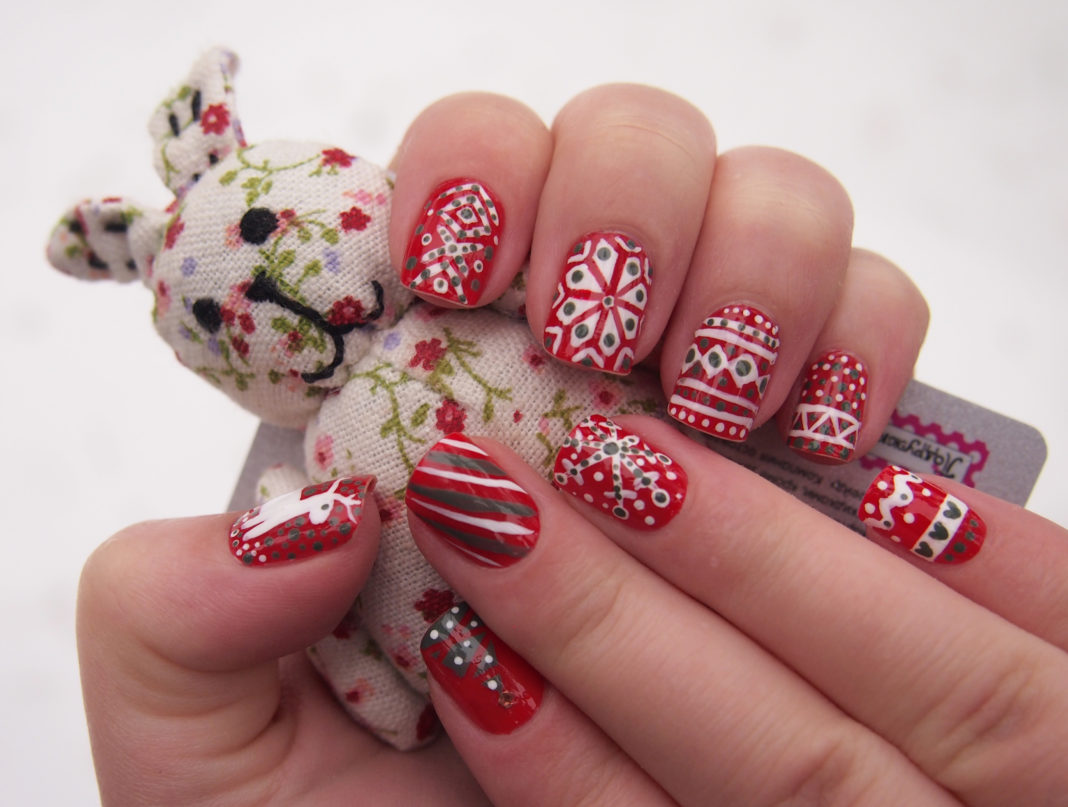
Acrylic patterns do not require drying. However, in order for them to last for a long time, you should apply a layer of topcoat to them. To apply the design, you can use a thin brush made of natural wool, dots, or a toothpick.
What and how to remove shellac at home?
Are we still washing shellac in salons, spending additional money on it? Today this is not necessary. You can remove the coating at home.
For this you will need:
- Nail polish remover.
- Pusher or orange stick.
- Foil.
- Cotton pad.
Before starting the procedure, you should wash and dry your hands thoroughly. You can treat your nails with a degreaser. After this, a piece of cotton pad soaked in a product capable of breaking down varnish coatings is applied to each nail. The nail phalanx of each finger is wrapped in foil, fixing the cotton wool with the solvent and not allowing the latter to evaporate.
Keep the compresses for 10-15 minutes. This time is enough for the polish to dissolve and come off the nail. After removing the foil, the remaining varnish is removed with a disk soaked in acetone and an orange stick. Hands are washed again, dried and treated with moisturizer.
Note: do not use aggressive industrial solvents to remove shellac. They are too concentrated and can cause severe chemical burns.
In general, gel polishes are one of the best manicure products available in modern cosmetology today. Shellacs are safe, resistant to the external environment, and look beautiful and elegant. Unfortunately, they are unlikely to become as widespread as regular nail polishes. The reason for this is the complexity of applying coatings and the need for special equipment for processing nail plates, drying and removing shellac.
Mamma Ytka
I’ve been thinking for a long time about purchasing the necessary tools to create a manicure with gel polish at home. Now, after reading this article, I no longer doubt my decision. Useful information, where everything is laid out on the shelves from “A” to “Z”, and also step-by-step instructions for action.